|
These
notes summarize the main
points covered in casting lessons delivered by Fly Fishing Devon.
The page outlines the purpose, strengths and weaknesses of
several casts. The signs and symptoms that help to
diagnose casting problems are outlined. Ways to overcome
these problems are suggested.
It will help your casting if you practise
between
lessons. These notes contain a number of suggestions on what to
do if you experience a problem when practising a particular
cast. You can also use them to help you plan further
lessons with Fly Fishing Devon. Always wear eye protection and a
hat when casting a fly rod. These notes are not a substitute for
qualified instruction. It's been said many times that you
cannot learn to cast a fly rod effectively by reading about it.
Fly casting involves developing a 'feel' for correct rod
loading. By watching your rod, line and arm movements an
instructor can help you develop your appreciation of the
sensations associated with good and bad casts.
Please do not feel intimidated by the long list of
things that
can go wrong with a cast. Bear in mind that one of the reasons
for coming to see us is so that we can help you cast effectively.
Instructors carry all this information around in their heads so
that they can help you concentrate on developing an effective
cast. Think of us as "casting doctors". We have been
trained to help you. You don't need a medical degree to know
where it hurts. But you do need a doctor to recognise the
symptoms and suggest a cure.
Fly fishing is fun and it is important to keep a
sense of
proportion. At the end of the session, your instructor will
highlight particular things that you should concentrate on to
improve your casting. Do not worry if some of the terms, symptoms
or cures on this page are a mystery to you. These notes are
designed to cover a wide range of casting needs and problems.
People vary in their casting strengths and weaknesses. You will
recognise the points that we emphasised during your lesson. These
are the ones you should concentrate on.
You can also use this list to decide on which cast
or problem
you would like to focus on in your next session with
us.
|
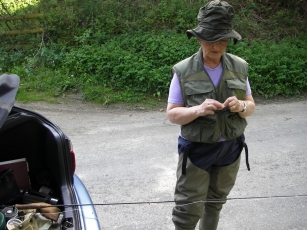
Preparation
|
- always wear glasses and a hat when casting
- avoid practising your cast on a hard
(concrete, tarmac etc.)
surface which can damage your fly line
- roll casts work best on water; you can
practise overhead
casts on grass
- rest your rod and reel on a soft flat
surface with the reel
handle uppermost
- bend a short length at the tip of the fly
line back on itself
before threading the fly line through the rod rings
- avoid excessive bending of the rod tip
when
threading the line through the rings
- it helps to clean your fly line with a
fly-line dressing;
dirty fly lines are difficult to 'shoot'
- put a mark with a waterproof marker pen
30 feet from the tip
of the line - this mark shows the length of line most rods are
designed to cast optimally
- you may find it more convenient to put
this mark on the
section of fly line that runs between the reel and the first ring
on your rod
- magnifiers that clip onto a peaked cap
make it easier to tie
knots
- attach a practice leader with a piece
(about the size of a
pea) of wool or synthetic yarn in place of a fly
- a short (7.5 feet) thick leader tapering
to 2X (.013 inch)
may help to reduce tangles
- applying Mucilin grease to the leader and
wool prevents them
sinking and reduces surface 'stick'
- carefully draw a rod's length of fly line
through the rod
rings and use a 'bow-and-arrow' cast to place leader and
line on water
- pull off about 30 feet of fly line from
the reel and drop it
at your feet
- swish the rod vigorously from
side-to-side with the rod tip
just above the water and use water tension to draw this line
through the rod rings
- use a roll cast to straighten the line on
the water
surface
|
|
|
The grip
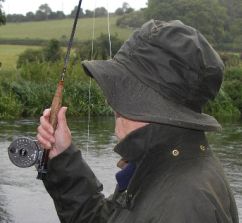 |
Do not
hold the rod handle too
tightly. Imagine that you are holding a little bird in your hand.
Relax your grip and let the rod nestle in your hand supported by
friction. Only squeeze the cork during the 'power snap'.
Try out various grips to find one that is comfortable and suits
your casting 'style':
- thumb on top - can encourage wrist break,
but good for
distance casts
- index finger on top - can reduce wrist
break and good for
accuracy
- Jason Borger's three point grip
- can reduce wrist
break and good for accuracy
- Paul Arden's cocked-thumb grip, can cause
cramp but
claimed to increase 'crispness' of the stop
|
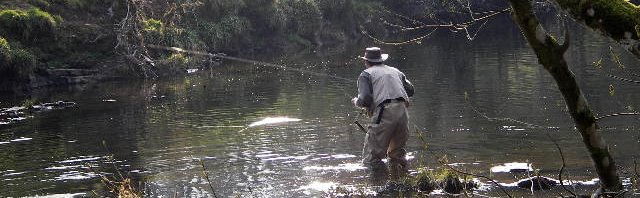
The stance
 |
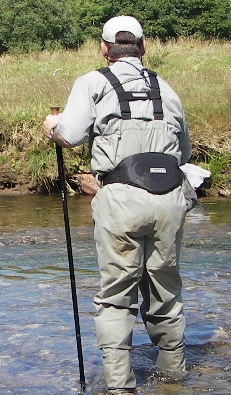 |
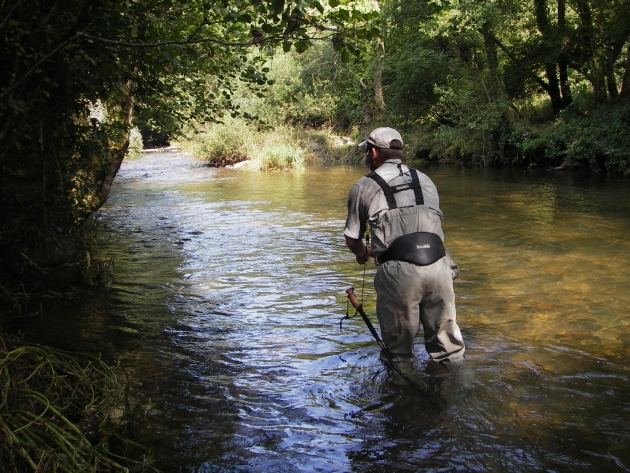
When standing in a river, your stance may
be restricted by
rocks etc.
Find a comfortable stance:
- stand facing the target with legs
side-by-side - the square
stance
- stand with casting arm foot forward - the
closed stance - may
improve accuracy especially if your rod hand is held in line
with your eye
- stand with casting arm foot backward -
the open stance -
allows you to watch your back cast, move your rod hand to the
side and make longer casts, but it may rotate arm and rod out of
alignment
- a wading staff gives confidence when
wading rocky rivers
- a lumbar support wading belt can prevent
an aching back
|
The roll cast
Roll cast
uses:
- when back cast is obstructed
- roll cast a deeply sunk fly line onto the
surface prior to an
overhead cast
- after line has been pulled off the reel
and placed on the
water in a heap
- after casting upstream and retrieving
slack line
- after dibbling the fly back towards the
boat when reservoir /
loch fishing
- it is a relatively safe cast - the fly is
normally in front
of the angler
|
Roll cast limitations:
- distance that can be cast is limited
- limited change of direction (maximum angle less
than 45
degrees - beware of the "Bloody L" - Simon
Gawesworth's term for an " L" shape in the anchor
of line lying on the water surface after forming the 'D'
loop)
- relatively inaccurate
- the fly is drowned as the line is drawn back to
create the
'D' loop; this is a limitation when fishing the dry
fly
- requires water to create tension that loads the
rod -
difficult to practice on grass
Roll cast key concepts mentioned during
the
session
- face the target
- start with rod tip on water surface
- draw line back slowly when creating 'D' loop
and
anchor point
- tilt the rod slightly away from your shoulder
- in the 'stop' position check the following
positions:
- your thumb should be pointing vertically up
to the sky
- your forearm should be in the vertical
position
- your elbow almost touching your ribs
- there should be a gap between your wrist
and the rod
butt
- your rod should be tilted backwards just
past the
vertical
- your rod should be canted out from your
shoulder
- align 'D' loop and anchor point in line with
target -
the 180 degree principle - anchor and 'D' loop should lie
along a straight line
- direct forward cast inside anchor point - if
line crosses it
will usually tangle
- roll casts utilise a fast
'snappy' wrist action
- when you are learning to roll cast it can help
to focus first
on this snappy wrist action before adding downward arm movement
into the forward stroke
- start forward stroke relatively slowly by
pulling down with
your elbow and hand, this will tilt the rod forward
- then accelerate the rod by adding the wrist
action - pushing
against the grip with your thumb and pull with ring and little
fingers
- imagine forcing the rod butt against your
forearm to create a
hard stop
- ways of expressing the arm and wrist movements
required in
the forward cast include: "smooth acceleration to an abrupt
stop", thump your hand down on a counter to demand attention
from a bartender, power snap, pop/stop, twitch, flick, whump,
"swat a fly with the rod tip"
- a "bloody L" in the line will interfere with
the
forward cast landing straight, bear this in mind when changing
direction
- raise / lower the rod-tip stop point on the
forward cast to
vary landing position
- at the end of the forward stroke your elbow
should be close
to your body
- at the end of the forward stroke your forearm
and elbow
should form a 90 degree angle
- do not throw your arm forwards during the
forward stroke
- aim high when shooting line
Roll cast key words may be used by your
instructor during
the session
- lift rod vertically to 45 degrees
- swing around the body to create the 'D' loop
- check position of:
- line (D loop) behind your rod and shoulder
- hand - thumb vertical
- rod - at 45 degrees to hand
- anchor point - pointing at target
- tap - calls to mind the idea of tapping a nail
into a wall in
front of the caster, other terms include 'power snap',
'wrist snap'
- stop position
Roll cast faults, causes and corrections
- line tangles.
- Caused by forward cast being directed over
/ across the
anchor point. The forward cast should be aimed inside the anchor
point i.e. the line lying on the water in front of the
caster
- line piles in front of caster.
- Caused by forward cast starting with too
much acceleration
before ending too slowly.
- Or, power applied too late in the cast
causing line to unfurl
/ run out across the surface of the water.
- line does not completely unroll.
- Caused by insufficient energy / snap /
power in the forward
cast
- the line hits the rod or caster.
- The line is lying too close to the caster's
shoulder - it
should be about half the rod length away from the shoulder, tilt
the rod away from the shoulder
- Or, the rod is being brought forward too
close to the caster
- tilt the rod off from the vertical so that the tip of the rod
is just inside the straight line made by the 'D' loop and
the anchor point.
- Or, a wind is blowing the line onto the
casters rod arm.
Roll casting further
 Line
can be shot into a
roll cast by releasing line during the 'wrist snap'
element of the forward cast. Line
can be shot into a
roll cast by releasing line during the 'wrist snap'
element of the forward cast.
There are a number of ways to increase the distance achieved by
roll casting.
They involve techniques that allow more line to be shot into the
forward cast by:
- increasing the size and effectiveness of the
'D'
loop
- and reducing line stick caused by a long anchor
- Use a 'slide pickup'. Let line slip through the
rod
rings as you draw line towards you to create a bigger 'D'
Loop
- Reduce line stick. Adopt an open
stance to smoothly
transfer body weight from your back foot to your front foot at
the start of the forward stroke. This 'rocking motion'
overcomes the effect of surface tension on the anchor
and slightly increases the size of the 'D'
loop.
- Speed up your cast. Slide the line across the
surface to form
the D' loop and make the forward cast as one continuous
movement. This overcomes the problem of surface tension gripping
the anchor point. It also creates a 'D' loop that is
already travelling in the direction it will take when you make
the forward stroke.
- Introduce 'drift' into the roll cast. Do this
by
raising your hand upwards and backwards a few
inches as you
complete formation of the 'D' loop and immediately before
making the forward stroke. Drift widens the casting arc by moving
the rod tip down. Raising your arm increases the size of the
'D' loop and decreases the length of the anchor. Drift
and the forward stroke should merge seamlessly into each
other.
- Use a 'thrusted backcast' during formation of
the
'D' loop. Make the drift with a flick or brief
'snap' of the wrist. Be careful to avoid lifting
all the line off the water during this movement.
- Put a haul into the 'wrist snap'
element at the
end of the forward stroke
- You can combine two or more of these techniques
to maximise
the chances of shooting line into the roll cast
It may help to adopt a two-handed roll cast with your non-casting
hand on the butt of the rod
Dealing with wind
- wind into the casting shoulder - tilt rod tip
over opposite
shoulder to make cast over that shoulder; twist the torso towards
that side
- head wind - make forward stop
low
- tail wind - create the "D" loop in the
horizontal plane, make forward stop high
Changing direction
- one drawback of the roll cast is that it only
permits limited
change of direction (maximum angle less than 45 degrees - beware
of the "Bloody L" - Simon Gawesworth's term for an
" L" shape in the anchor of line lying on the water
surface after forming the 'D' loop)
- larger changes in direction require preparatory
moves to
reposition the anchor point. These movements
are described
on a separate page
Overhead cast / pick up and lay down cast
Overhead cast uses:
- achieve distance
- achieve accuracy
- lengthen line through false casting
- dries the fly through false casting
Overhead cast limitations:
- requires sufficient room behind and
overhead
- potentially dangerous - the fly passes
behind the angler
|
Overhead cast key words that may be
used by your
instructor during the session
- lift - rod vertically until line clears water,
do not allow
slack to develop
- tap - back and upwards along a diagonal line
- stop - check rod position; if necessary allow
line to fall to
ground
- pause
- tap
- stop
Overhead cast building blocks
- Casting stroke: The path taken by the hand during the cast
- Casting or rod arc: The change in the angular
position of the
rod butt
from the start
to the end of the stroke
- Stroke length: The distance the rod tip travels within a
given casting
arc. Stroke length is directly proportional to the length of line
being cast
Overhead cast helpful hints
- always start the back cast with the tip of the
rod close to
the water surface to reduce slack line
- try to start with a straight line in front of
you; if
necessary roll cast to straighten the line, or take a few steps
backwards to straighten line
- accelerate smoothly to a firm stop
- stop the rod on the back cast when the fly
leaves the
water
- stop the rod when your thumb brushes against /
reaches the
level of your ear lobe
- pause to allow the line to unroll behind you
- you may find it helpful on the back / up cast
to think of the
rod tip traveling up the wall of a house, and then up a pitched
roof; but do not pause the rod on this journey
- you may find it helps to concentrate on one
thing at a time.
For example, concentrate on the back cast even if it means
allowing it to fall to the ground behind you; then rotate 180
degrees and make another back cast
- concentrate on how the rod and line feel when
you make a good
cast - try to remember that feeling so you will recognise for
yourself when you make a good cast
- you don't need a rod to practice your casting.
'Pantomime' casts and engage in 'mental
rehearsal' between casting sessions
- expect things to go wrong, particularly at the
start of each
session. Persevere and your performance will soon 'warm
up'
- be prepared to seem to go forward two steps and
back one
step.
- finish each session with an element you are
good at
Overhead cast refinement drift
and
creep
- Drift or 'follow through':
-
- drift is an example of good casting 'style'
- drift is executed after the rod has been
stopped on the back
cast; the rod is slowly drifted in the direction of the back cast
after the rod has been stopped
- drift is executed in different ways by
different casters
- Lefty Kreh moves his hand backwards
horizontally which moves
the rod tip back and down
- Jerry Siem opens his wrist to move the rod
tip down
- Joan Wulff lifts her arm which moves the
rod tip back and
down
- drifting is the 'cement' in a 'continuous
tension' cast where drift is still noticeable as the caster
shifts their body weight in preparation for the forward cast
- drift widens the casting arc by moving the
rod tip down
- drift increases stroke length by moving the
hand and rod
backwards
- drift can occur on the back and forward
cast. However, the
term 'follow through' is usually used to refer to drift
on the forward cast
- follow through involves extending the
casting arm and
pointing rod at target; this may reduce friction between rod
rings and fly line which can increase distance achieved by the
cast
- Steve Rajeff advocates follow through"via
wrist
turnover, following the stop"
- think of drift and follow through as "fluid
movements
relaxing into the direction of the cast"
- Creep:
- an undesirable feature; reduces potential
length of casting
arc and stroke length
- the rod is moved in the direction to the
upcoming stroke
before the line has straightened and then the rod is
stopped
- can introduce slack and unload the rod
- can be caused by the caster moving the rod
forward, or the
tip of the rod bouncing forward after an overpowered cast
- the term 'creep' is normally used to refer
to rod
movement prior to the forward casting stroke. However, the
beginners tendency to raise the rod tip from the water surface
and pause before making the back cast also reduces potential
stroke length and introduces slack, and is therefore an example
of creep
- Drift and creep are opposites
- Slide loading: occurs after the stop on the
backcast,
involves shooting line into the backcast with simultaneous
forward movement of the rod; said to preload the rod at the start
of the forward cast. Should not be confused with creep. Unlike
creep the rod is not stopped after slide loading.
Overhead cast faults, causes and
corrections
- line fails to straighten on the forward cast.
Can be caused
by problems on the back cast or forward cast.
- Back cast problems:
- rod tip raised too far off water
surface at start of cast,
causes "J" loop between tip and water; compromises
stroke length
 wrist break causing line to drop on the back cast
- a
potentially serious problem. wrist break causing line to drop on the back cast
- a
potentially serious problem.
Try the following:
- index finger on top grip
- Borger three-point grip
- think "stiff wrist"
- look at your wrist as you cast
- pull back with ring, middle and
little finger to brace rod
against forearm
- tuck rod butt into shirt sleeve to
get 'feel' of a
stiff wrist
- hold rod butt against forearm with
non-casting arm
- rotate rod through 180 degrees to
place reel against
forearm
- make up / back cast in front of
face, touch tip of nose with
thumb / forefinger
- make a cast in the horizontal
plane, laying line on ground at
end of each forward and backward stroke
- just make the backcast, allow line
to drop to ground, turn
around 360 degree, walk backwards to straighten line, repeat
backcast
- cast with just the top rod section
- pause too long causing line to drop on
back cast
- forward cast problems:
- weak or absent 'power stroke' /
'acceleration to
a stop' on forward cast line land in curves on the
water
- too much force on forward cast causing
line to bounce back
and land in curves on the water after the stop
- rod stop position too high - line lands
in curves on
water
- rod stop position too low - end of line
and leader crashes
into water in a heap
- shooting line before the 'stop' on the
forward cast -
line fails to straighten
- whip crack noise during forward cast;
- insufficient length of pause after back
cast before
commencing forward cast;
- or caused by insufficient power on the back
cast which
results in the line not straightening, consequently the line is
drawn around the 'U' at great speed.
- line hits caster on back cast:
- caused by wind onto casting arm, or rod not
tilted off to the
side,
- or tip not on water at start of cast
causing slack in the
line, or pausing between lift and application of power causing
slack to develop,
- line hits caster on forward cast:
- caused by low back cast, due to starting
forward cast with
too much power,
- or the line is too heavy for the rod, or
too much line in the
back cast, or the rod is 'sloppy' all of which can cause
the line to drop on the back cast
- 'whooshing' noise during back cast:
- caused by too rapid an acceleration during
the early phases
of the back cast, look out for the line being ripped off the
water surface and throwing up spray.
line lands with a splash:
- caused by aiming too low on the forward
cast,
- or releasing line too soon on the shoot, or
'bowing'
the body towards the water on the forward cast,
- or starting the forward cast with the rod
hand held too high
e.g. above the head,
- tailing loops: refers to crossover of the upper
and lower
legs of the unrolling loop
- it is the opposite of too wide a loop
- can produce 'wind knots' or tangle the line
- caused by the tip of the rod dipping below
'the straight
line path'
- often due to the application of too much
power
- reduce power; think 'smooth'
application of
power
- try relaxing the grip on the rod after
'power
snap'
- allow your back cast to straighten before
starting the
forward cast
- There are a number of casting faults that
result in tailing
loops:
- FAULT: overpowering the forward stroke,
CURE use less force
on the forward cast, think 'smooth application of
power'
- FAULT: lack of forward 'loading move'
(similar to
overpowering the forward stroke or starting the power stroke too
early). CURE: 'Slip loading' - maintainrod butt angle
constant and only rotate the butt - to apply power - at the end
of the stroke
- FAULT: casting arc is disproportionate to
rod flex, CURE;
adjust casting arc to rod flex
- FAULT: stationary elbow with snapping
wrist, CURE raise elbow
on back cast, and lower the elbow on forward cast;
- FAULT: carrying elbow straight back and
forwards on back and
forward cast, CURE raise elbow on back cast, and lower the elbow
on forward cast;
- FAULT: back cast too high, forward cast too
low, CURE: lower
the back cast
- FAULT: forward power stroke started too
late causing tailing
loop on forward cast, CURE: start power stroke sooner in the
forward cast
- FAULT: punching the forward cast by moving
the arm forward,
CURE don't make the forward cast straight forwards.
- FAULT: forward stroke begun too soon (also
known as
'forward creep'), CURE pause to allow the back cast
to unroll before making the forward stroke; learn to
'drift'
- line twists: symptom is a series of twists in
the line which
appear between the reel and the stripping guide (first rod ring),
caused by the back and forward casts not being made in the same
vertical plane. The rod tip travels in an elliptical path
False
cast
False cast uses:
- drying the fly
- lengthening line
- changing direction - in steps of about 45
degrees
False cast limitations:
- excessive false casting scares fish
False cast key words may be used by
your instructor
during the session
Shooting line
Shooting line uses:
- increasing length of line outside the rod tip
Shooting line key words may be used by
your instructor
during the session
Shooting line faults, causes and
corrections
- line fails to shoot, caused by releasing the
line before
stopping - or too long after stopping - the rod on the
forward cast
Reach cast
Reach cast uses:
- use a reach cast if a fish is lying in
relatively slack water
on the other side of a strong current. Reach to the left or right
according to the direction of the main current.
- use a reach cast to avoid 'lining' fish that
may be
lying between you and your target fish
- use a reach cast to present a fly to a fish
lying
'behind' an obstacle between you and the fish
- when sea trout fishing with a 'wake fly' in a
slow
current, a reach cast can be used to create drag.
Reach cast key words may be used by
your instructor
during the session
- shoot line into forward cast
- reach
Slack line cast
Slack line cast uses:
- allows for 'drag free drift' e.g. when fishing
a dry
fly downstream. The current will take out the wiggles in the cast
without causing the fly to drag
Slack line cast key words may be used
by your instructor
during the session
- shoot line into the forward cast
- wiggle rod tip from side to side
Double-haul cast
Double-haul cast uses:
- to achieve distance
- casting into a headwind
|
The double-haul increases line speed and increases rod loading
through friction of line on rod rings - i.e. it increases the
bend in the rod
Double-haul Limitations:
- can be difficult to learn this cast
Double-haul concepts:
- 4 learning steps:
-
- false cast with hands together
- haul into forward cast and shoot line
- haul into back cast
- bring line hand back to meet rod hand,
- let line fall on ground or onto water
- check that line falls in a straight
line.
- put it all together; haul on back cast,
hands together, haul
on forward cast, shoot line
- up
/ down
elbow movement
- rod 'drift'
Double-haul key words may be used by
your instructor
during the session
Double-haul faults: causes and
corrections
Don't try to learn to double-haul until you can
perform
the basic overhead cast.
- slack line between hand and stripping ring;
caused by a weak
back cast, or failure to 'give back' line on the back
cast - by moving line hand up to the rod hand - at the correct
time.
- rod and line hand not together at start of
forward cast; cure
by practicing back cast with both hands touching
- hauling on forward cast too late / early; haul
should be made
during the 'acceleration to a stop' / 'power
snap'.
- hauling on back cast too late / early; haul
should be made
during the 'acceleration to a stop' / 'power
snap'.
Single haul into the forward cast:
Uses:
- to cope with a headwind - wind blowing onto
your face
- single hauls increase line speed
- single hauls increase rod loading - i.e.
increase the bend in
the rod
Single haul into the back cast:
Uses:
- to cope with a tailwind - wind blowing onto
your back
- single hauls increase line speed
- single hauls increase rod loading - i.e.
increase the bend in
the rod
Leaders
If you use the clinch knot to tie your fly to the tippet (line at
end of the tapered leader), five turns will hold with materials
down to 4X. But with smaller diameter tippets, five turns does
not give a knot with sufficient bulk. Use the following X+2 rule
with small diameter tippets.
| Tippet X rating |
Clinch knot turns |
| 1X |
5 turns |
| 2X |
5 turns |
| 3X |
5 turns |
| 4X |
5 turns |
| 5X |
X+2=7 turns |
| 6X |
X+2=8 turns |
| 7X |
X+2=9 turns |
Fly size and tippet size
A simple rule to determine what tippet size to use with a
particular size of fly is:
- fly size divided by 3 equals your tippet size
in X. For
example, if your fly is size 12, use a 4X tippet (12/3=4)
|

